Chkdsk – What is chkdsk?
Windows has an inbuilt feature called CHKDSK that you can use to analyse hard drive errors and run repairs automatically. This tool can be check and fix the bed sectors. It is a useful tool for performing computer maintenance.
To run CHKDSK in Windows 10 or 8.1 in the steps below.
How to run CHKDSK in Windows 10 or 8.1
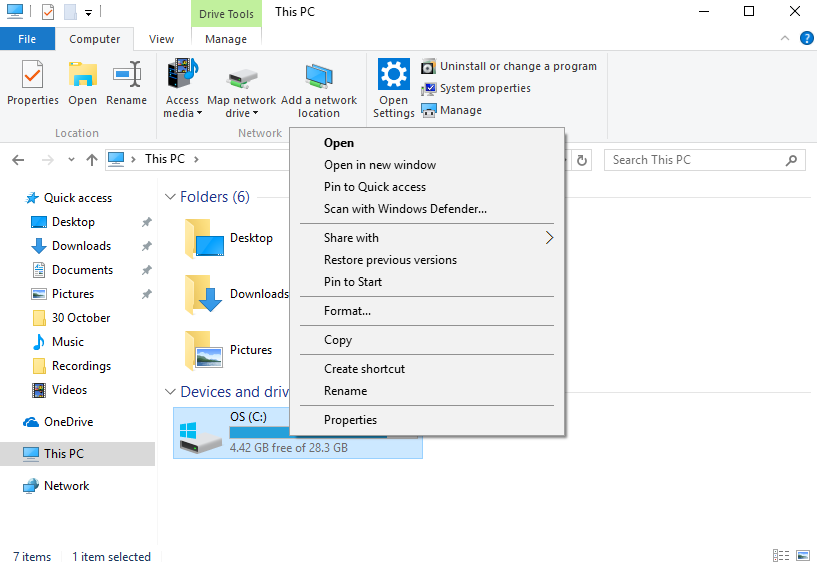
To start, open a new File Explorer window (click Windows key + E) then click This PC. Right-click on the drive that you wish to scan – most commonly this will be your C: Drive or D: Drive – then click Properties.
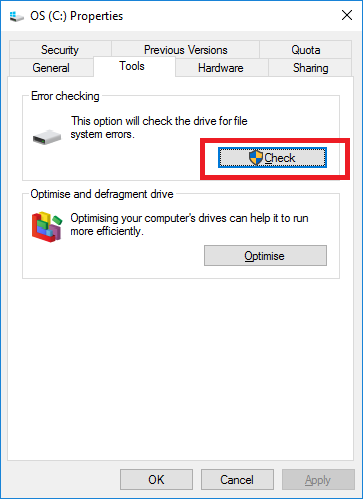
The Properties window for the selected drive will now open. Here, click the Tools tab and then click Check under the Error checking section.
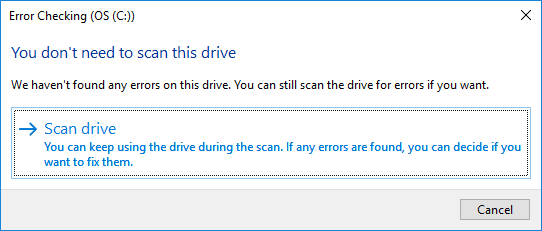
If your PC thinks everything is running smoothly, it’ll show a window stating that you don’t need to scan the drive at all. However, if you’d prefer to run a CHKDSK scan, you can proceed by clicking Scan drive below this.
Don’t worry, you can’t do any damage to your PC by running this scan process.
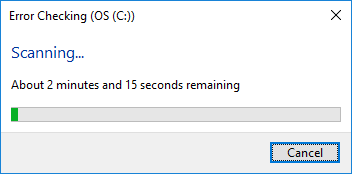
The CHKDSK function will begin its checks. Depending on the size of your selected drive, and the amount of data stored on it, this process could take anything from a few minutes to half an hour.
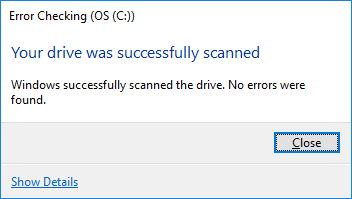
If all is well, you’ll receive the good news that the drive has been completed and no errors were found. However, if the CHKDSK scan does find errors, it will attempt to fix what it can.
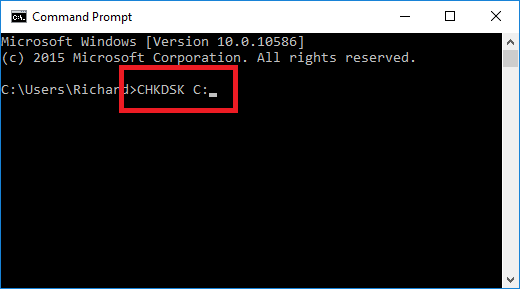
Alternative: run CHKDSK from a Command Prompt
There’s another, simple, way of initiating a CHKDSK process – you can do so directly from a command prompt window.
To do this, open up command prompt (click Windows key + X then select Command Prompt – Admin).
In the command prompt window, type in CHKDSK then a space, then the name of the disk you wish to check. For example, if you wished to perform a disk check on your C drive, type in CHKDSK C then press enter to run the command.